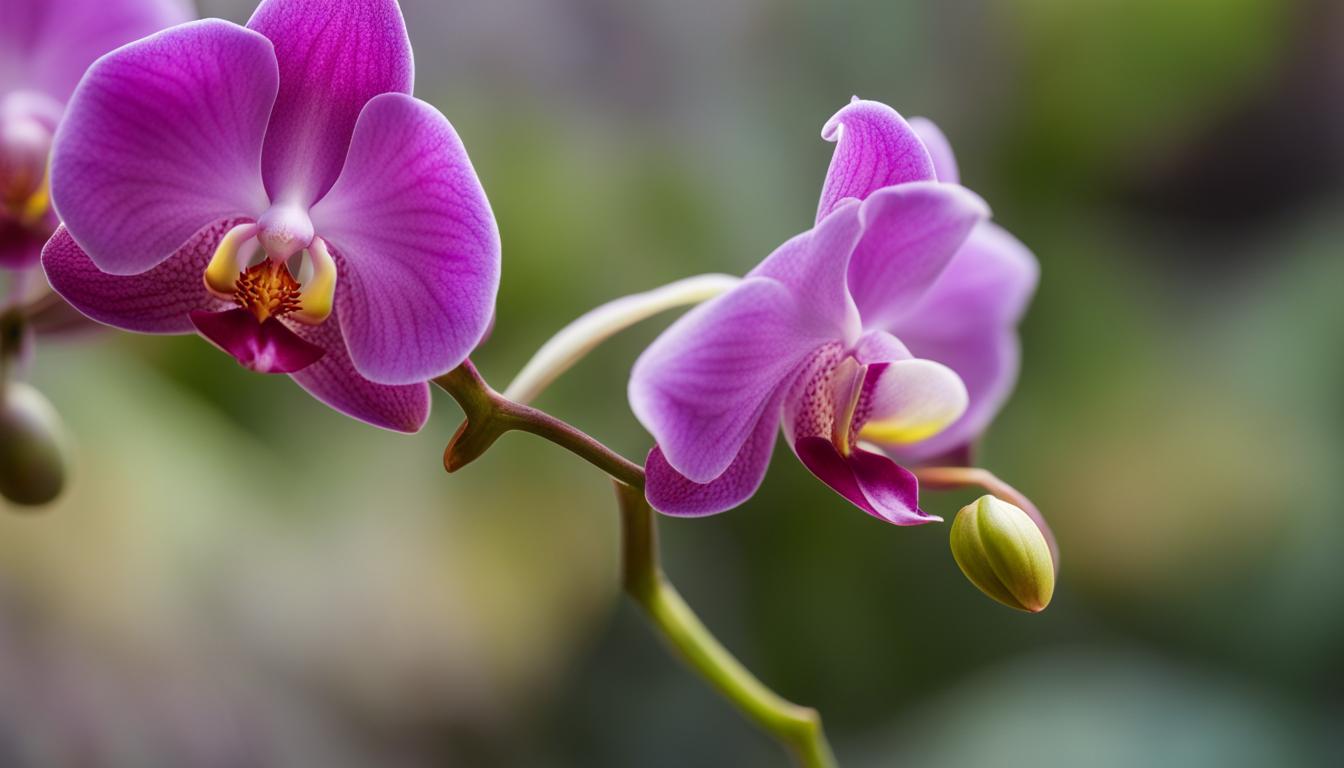
As an orchid enthusiast, I’ve found that mastering the art of orchid stem node propagation can be a truly enriching experience. Orchids, with their reputation for delicacy, demand our patience and care, yet they generously reward us with breathtaking blooms.
Propagating these fascinating plants, especially through the method of stem node propagation, not only deepens my connection to these botanical wonders but also extends my collection in the most personal way.
I’m excited to share with you how to propagate orchids using this technique. Embarking on this journey requires some insight, and my goal is to provide you with an informative orchid propagation guide that simplifies this seemingly complex process.
So, let’s dive into the world of orchid propagation together, and I’ll show you just how satisfying it can be to watch a new life sprout from an orchid node.
Key Takeaways
- Understanding the basics of orchid stem node propagation is essential for growing your orchid collection.
- A structured guide can simplify the process of how to propagate orchids.
- The right knowledge and tools are key for effective orchid propagation at home.
- Patience and precision are vital components of successful orchid growth from nodes.
- Adopting best practices ensures a higher success rate in orchid propagation.
Understanding Orchid Propagation
The art and science of reproducing orchids, one of nature’s most exquisite blooms, requires a deep understanding of the right orchid propagation techniques.
As a seasoned horticulturist, I’ve witnessed the many layers of complexity behind what may initially seem like a straightforward process. Here, I offer insights into the common misconceptions that surround orchid propagation and share the intrinsic rewards that can only be felt when one has mastered the best practices for orchid propagation.
Common Misconceptions About Orchid Propagation
In my journey, I’ve encountered several myths that can lead beginners astray. For example, some believe that Phalaenopsis orchids can magically spawn new plants from the simple snip of a flower stem. Contrary to this belief, without a Keiki, a naturally occurring offspring on the orchid, a flower stem is unlikely to yield a new plant.
Additionally, the assumption that air roots can be solely relied upon for propagation also misses the mark, given that successful growth relies on specific parts of the orchid that contain the necessary regenerative cells.
Let’s clarify one thing: Not all parts of an orchid have the potential of rebirth. Understanding this is the first step towards successful propagation.
The Rewards of Successful Orchid Stem Node Propagation
The sheer joy of mastering orchid stem node propagation is unparalleled. Imagine nurturing a mere cutting into a full-blown orchid plant, complete with vibrant blooms.
This accomplishment is not just about adding an aesthetic touch to your living space; it’s a testament to patience, dedication, and the implementation of best practices for orchid propagation.
It’s about the triumph of life itself, asserting through a dainty stem that has been thoughtfully coaxed into existence.
To the untrained eye, orchid propagation might appear mystical, but it’s intricately scientific at its core.
As we delve deeper into the nuances of orchid propagation, our respect for these majestic plants grows, and so does our commitment to fostering their continuity through careful cultivation and propagation.
On this exciting path of propagating orchids, not only do we enhance our own understanding of these botanical wonders, but we also get to share the enchanting experience with fellow enthusiasts, thereby spreading both knowledge and the breathtaking allure of orchids.
Orchid Stem Node Propagation: A Comprehensive Guide
As an orchid enthusiast, I’ve always been captivated by the delicate beauty of orchids and the complex yet rewarding process of orchid plant propagation.
Through my experiences, I’ve learned that one of the most effective methods for propagating these exquisite plants is stem-cutting propagation. This process is both an art and a science, requiring precision and patience.
Here, I’ll share insights into successful stem node propagation techniques for different types of orchids.
Monopodial orchids, such as the popular Phalaenopsis, showcase a single vertical growth pattern that lends itself well to stem-cutting propagation.
To begin the propagation process, I identify a robust and healthy stem – a crucial step that can’t be overstated. As opposed to using a flowering stem, selecting a vegetative stem is essential to ensure the propagation’s success.

Applying the method commonly known as “topping,” I carefully cut the chosen stem, encouraging the lower half to maintain its growth momentum, while the upper portion becomes the focus of our propagation efforts.
This upper section is nurtured in a hospitable environment of moist sphagnum moss, aimed at inducing root development.
For sympodial orchids, like Dendrobium nobile, which grow horizontally, I turn to cane cuttings. These orchids offer another excellent opportunity for propagation via stem cuttings.
The process involves selecting a firm cane and positioning it in a similar moisture-rich medium to trigger new growth.
Sympodial orchids often have multiple growth points along their canes, making them ideal candidates for this technique.
Patience is a virtue in orchid propagation, knowing when to cut, where to cut, and how to provide for the cuttings post-operation is key to seeing new orchid life flourish.
- Inspect the orchid carefully, ensuring the chosen stem is disease-free.
- Sterilize the cutting tool before making any cuts to prevent infection.
- Apply a rooting hormone to the cut section to encourage root growth.
- Maintain humidity and indirect sunlight to foster optimal growing conditions.
| Propagation Step | Monopodial Orchids | Sympodial Orchids |
|---|---|---|
| Selecting a Cutting | Healthy, well-established stem | Firm, mature cane |
| Medium for Propagation | Moist sphagnum moss | Moist sphagnum moss or other suitable medium |
| Post-cutting Care | High humidity, indirect light, and warmth | Similar care with emphasis on maintaining cane hydration |
Propagating orchids through stem cuttings can be a deeply satisfying experience, provided that the process is approached with knowledge and care.
Understanding which parts of the plant are most conducive to regeneration and providing the right conditions post-cutting are vital to encourage the successful growth of new orchids.
Whether dealing with monopodial or sympodial species, stem-cutting propagation opens up a world of possibilities for multiplying your orchid collection.
The Ideal Conditions for Propagating Orchids
As an orchid enthusiast, I’ve learned that replicating the perfect environment is crucial for successful orchid propagation at home.
Creating conditions that foster the plant’s natural habitat not only promotes growth but also leads to a flourishing orchid that exudes vitality.
Let me share with you, from my experiences, some orchid propagation tips that hinge on the pillars of optimal lighting, temperature, and humidity.
Lighting Requirements for Orchid Growth
To begin with, understanding the ideal lighting conditions for orchids is paramount. These exotic plants thrive in an environment that offers a semblance of their natural, tropical homeland.
Gentle, indirect light is the secret to stimulating growth, and I recommend providing orchids with about 3-4 hours of such light every day while ensuring they’re shielded from the harsh midday sun.
If you’d like to learn more about Orchid Lighting conditions, then check out my in-depth article: Orchid Lighting Requirements: Sunlight and Artificial Light
Temperature and Humidity: Keys to Orchid Health
Moving on to temperature and humidity, which are equally significant factors in orchid care, the goal is to replicate the warm days and cooler nights of a rainforest.
Daytime temperatures should ideally hover between 70-75 degrees Fahrenheit, complemented by a slight drop to 60-65 degrees during nighttime.
Humidity levels should be maintained, imitating the moist embrace of a tropical climate, which not only aids in orchid propagation but also helps in sustaining the health of the plant.
Ensure good air circulation to emulate the gentle breeze of its native habitat.
If you’d like to learn more about Orchid Temperature and Humidity conditions, then check out my in-depth article: Orchid Temperature and Humidity Control Techniques

How to Propagate Orchids: Tools and Materials You’ll Need
As an avid gardener with a penchant for the sublime beauty of orchids, I’ve found that having the right set of tools is pivotal for embarking on the journey of orchid propagation techniques.
Let’s delve into the essentials that you’ll need to propagate orchids successfully.
I’ll help you prepare your propagating workbench, ensuring you have the necessary items for the propagation process.

Firstly, make sure that your pruning shears are disinfected; I typically use rubbing alcohol to wipe down the blades. This reduces the risk of transferring any potential diseases to the cutting or the mother plant.
Next, you’ll need a suitable container that correlates with the size of your new orchid. Whether that be small planters or hangers, they must allow for adequate drainage and root growth.
Sphagnum moss is another critical component; it provides the ideal moisture and air balance, serving as the perfect medium for encouraging root development in your orchid cuttings.
Here is a table listing all the materials along with their purpose, so you’ll know exactly what to get and why it’s necessary.
| Tool/Material | Purpose | Notes |
|---|---|---|
| Pruning Shears | To cut orchid stem nodes or spikes | Disinfect before use to prevent infection |
| Rubbing Alcohol | For disinfecting tools | 70% isopropyl alcohol recommended |
| Planters or Hangers | For potting new orchid plants | Ensure appropriate size and drainage |
| Sphagnum Moss | Propagation medium | Retains moisture and affords aeration |
With these tools prepared and at hand, you’re set to start propagating your beloved orchids. Remember, each type of orchid might require slightly varied approaches, but these are the universal basics to arm yourself with.
Good luck, and enjoy the rewarding experience of growing your orchid family!
Step-by-Step Process for Stem Cutting Propagation
Stem-cutting propagation is a fascinating aspect of any orchid propagation guide, inviting gardeners to explore the renewal of orchid life.
My approach to this technique has been shaped by thorough research and hands-on experience, resulting in a process that favors the successful generation of new plants.
Let me walk you through each crucial phase.
Initially, I seek out an orchid branch that’s ceased its blooming phase, ensuring it has nodes, as these are critical for the upcoming sprouting.
I meticulously cut off this segment and, without delay, apply a protective sealing agent, often a candle wax solution, to ward off any potential rot and create a barrier against pathogens.

Following this, the freshly-cut stem undergoes a 30-minute soak in ginger water, a concoction made from freshly steeped ginger, which has remarkable effects on the cuttings, preparing them for the growth phase.
The subsequent step involves an innovative usage of recycled boxes. These makeshift mini-greenhouses offer an ideal humid environment to nurture the cutlet, wrapped in a cocoon of sphagnum moss saturated with the same ginger water concoction.
- Selection of a non-blooming orchid branch with nodes
- Cutting the stem with sanitized tools
- Sealing the cut areas with a candle solution
- Soaking the stem in ginger water for rejuvenation
- Placing the stem in a mini-greenhouse environment
This microcosm does wonders, mimicking the orchid’s native humidity levels, which encourages rooting. As new roots begin to appear, a gradual transition is made to a pot, where the cutting, blessed with a secure base, continues on its journey to become a thriving orchid plant.
Throughout the process, patience and attention to detail are paramount. Such dedication ensures successful stem-cutting propagation results, adding to the diversity and beauty of my orchid collection.
Advanced Orchid Propagation Techniques: Keikis and Division
As an orchid enthusiast, I am always looking for refined methods to enlarge and diversify my collection. Mastering advanced propagation techniques such as working with keikis and division not only tests my green thumb but allows me to share orchids with fellow aficionados. Leveraging these practices certainly elevates the joy of orchid propagation at home.
Separating Keikis from the Mother Plant
Keikis, intriguingly, are newborn orchids the mother plant gifts us. They’re a sign of robust health and a doorway to new growth. By adhering to best practices for orchid propagation, I ensure that the keikis are mature enough, with ample leaves and roots, before I ever so gently guide them into their individual pots.
This process not only multiplies my collection but also ensures each new plant is a strong specimen.

Dividing Orchids for Increased Production
In the case of sympodial orchids, I find division fascinating. It’s like unraveling a vegetative puzzle, separating pieces of the orchid rhizome to encourage the productivity of each segment.
Every piece, blessed with active eyes or canes, holds the potential to become a standalone beauty.
Such division not only revamps the parent plant’s vigor but also inspires an ardent wave of propagation.
| Action | Advantage | Timeframe |
|---|---|---|
| Keiki growth observation | Ensures healthy development | Several weeks to months |
| Keiki separation | Increases plant count | Once mature enough |
| Orchid division | Rejuvenates mother plant | Dormancy period |
| Potting new growth | Encourages robust offspring | Immediately after separation/division |
While these methods require a tad more knowledge and patience, the rewards are plentiful. Each division or keiki turned thriving orchid is a resounding endorsement of the precise care and affection invested in their propagation. It’s indeed a labor of love that beautifies the home and heart.
Mistakes to Avoid and Best Practices for Orchid Propagation
When it comes to orchid propagation, enthusiasm alone isn’t enough. A small misstep can halt the growth of these captivating plants.
Learning from others’ experiences is essential; thus, I present key orchid propagation tips and highlight critical mistakes to avoid in orchid propagation, all designed to ensure the success and health of your orchid’s progeny.
One of the daunting tasks for new gardeners is recognizing early that proper sterilization is not optional.
Even the most minor negligence in disinfecting tools can spearhead an array of diseases, potentially leading to the loss of orchid blooms or even the entire plant.
Therefore, it’s crucial to sterilize your pruning shears, pots, and all other tools prior to engaging with your orchid.
- Research: Before making that initial cut, understand the specific needs of the orchid species in your care.
- Lighting and Temperature: These need to be delicately balanced according to the particular species’ requirement—no guesswork here.
- Watering: More is not better. Orchids require careful watering to avoid root rot, so ensure that the medium is moist but not saturated.
| Best Practice | Common Mistake | Outcome of Correct Practice |
|---|---|---|
| Disinfect tools before use | Using dirty tools | Prevents disease transmission |
| Repot using fresh medium | Retaining old or contaminated growing medium | Encourages healthy root growth |
| Maintain humidity levels | Allowing the growing environment to become too dry or too damp | Creates an environment conducive to orchid development |
| Regularly check for pests | Neglecting plant health inspections | Keeps the orchid thriving and pest-free |
Remember, your patience will be the game-changer in propagating orchids. Taking the time to optimize conditions and monitor progress will help you sidestep setbacks and move towards blossoming success.
And finally, don’t rush the propagation process. Orchids grow at their own pace, in harmony with their environment.
If you’d like to learn about Clonal Propagation, then please read my other article: Clonal Propagation: Producing Identical Orchids

Conclusion
Embarking on orchid stem node propagation is akin to undertaking a botanical journey; one that demands both precision and patience. I’ve discovered that the endeavor isn’t just about fostering new growth, it’s an engaging way to deepen my relationship with these exquisite plants.
Through this guide, I’ve highlighted the critical steps and conditions necessary for successful orchid plant propagation.
It’s evident that when the right techniques are applied, the act of nurturing an orchid from node to full bloom can be incredibly fulfilling.
Throughout the process, I encountered various challenges, from ensuring the ideal setting to meticulous sterilization, all of which tested my resolve. Yet, each obstacle surmounted has amplified my respect for these resilient florae.
Implementing the strategies and tips detailed within this orchid propagation guide has led to greener leaves and more vibrant blooms within my living space, confirming that attention to detail is vital.
Avoiding common missteps has made all the difference in elevating my orchid propagation success rate.
Ultimately, the art of orchid propagation is more than a horticultural skill, it’s a testament to the complex beauty of nature that I can now appreciate daily.
For fellow enthusiasts eager to explore the world of orchids, applying the wisdom enclosed in this guide serves not just as a roadmap to propagation, but also as an invitation to join a community of gardeners who share a passion for these magnificent botanical wonders.
FAQ
What is orchid stem node propagation and how does it differ from other propagation methods?
Orchid stem node propagation involves taking a cutting from an orchid stem that has nodes capable of developing into new plants. This method is distinct because it exploits the plant’s natural ability to generate new growth at specific points (nodes) along the stem, in contrast to other propagation methods like division, which separates an orchid into multiple parts, or tissue culture, which is a laboratory-based practice of multiplying orchids at a cellular level.
Can I propagate orchids from just any part of the plant?
No, not all parts of an orchid are suitable for propagation. The parts containing the specialized cells necessary for regeneration, such as nodes or offshoots known as ‘keikis’, are the ones capable of developing into new plants. Trying to propagate from unsuitable parts like flower stems without nodes or keikis will not succeed.
What conditions are ideal for orchid propagation at home?
The ideal conditions mimic an orchid’s natural environment, with bright but filtered light, temperatures between 70-75 degrees Fahrenheit during the day and slightly cooler at night, good air circulation, and appropriate humidity levels. Orchid stem node propagation thrives under these conditions, which encourage healthy new growth.
What tools do I need for propagating orchids?
Essential tools include disinfected pruning shears, a sterilized cutting surface, planting containers or hangers suitable for orchids, and a medium like sphagnum moss. Additionally, tools for sealing cut areas, such as natural tree fungicides or candle wax, may be needed to prevent infection.
How do I propagate an orchid from a stem cutting?
To propagate from a stem cutting, select a stem with nodes and snip below the lowest node. You may treat the cutting with a rooting hormone or natural solutions like ginger water for enhanced growth. Place the cutting in moist sphagnum moss until roots and shoots develop, after which the new plant can be potted.
What are keikis and how do they fit into orchid propagation?
Keikis are baby orchid plants that sometimes grow on the mother plant. They are a natural means of propagation and can be left to mature on the mother plant until they develop a sufficient root system. Once ready, they can be carefully removed and potted independently.
How do I divide an orchid to get more plants?
Dividing an orchid involves carefully separating the plant at the rhizome, ensuring that each division has at least one pseudobulb or cane, and some root system attached. Divisions are then potted separately and treated as new plants, continuing the orchid’s lifecycle.
What are the common mistakes to avoid in orchid propagation?
Common mistakes include using non-sterile tools, which can spread diseases, overwatering cuttings, which can cause rot, and not providing ideal light and temperature conditions. Avoiding these mistakes is critical for promoting healthy growth and achieving successful orchid propagation.
Is using ginger water necessary for orchid propagation?
While not necessary, using ginger water for soaking orchid cuttings is a natural method enthusiasts sometimes employ to stimulate growth. The ginger contains compounds that might aid in preventing infections and promoting root development, but it is not a universally accepted or required practice.
Can I propagate an orchid from a leaf?
Generally, orchids cannot be propagated from a leaf cutting. Orchid propagation is more successful with stem cuttings that contain nodes, as these are capable of producing new plants, or by using keikis when they are present on the orchid.
Leave a Reply