When I embarked on my journey of orchid seed propagation, I swiftly realized that it was a world distinct from other forms of plant cultivation. Orchid seeds are renowned for their peculiar requirements, from the minute size that demands special attention for handling to the intricate nutritional needs for successful growth.
Mastering how to propagate orchid seeds has opened up a realm of exquisite beauty and delicate floral mastery. A crucial aspect of achieving orchid seed germination lies in creating a sterile environment, as these tiny marvels of nature are quite susceptible to contamination.
Through patience and precise techniques, I’ve learned that home cultivation of orchid seeds is indeed possible, leading to remarkable orchid seed growth.
Unlike common plant seeds that carry their own food supply, orchid seeds need an external source of nourishment, typically through a fungal partnership or a carefully prepared nutrient-rich medium.
With each meticulous step, from sowing to germination, I’ve unraveled the compelling secrets these seeds hold, allowing anyone to grow their own stunning orchids.
Key Takeaways
- Orchid seed propagation demands a sterile environment and specialized care.
- Orchid seeds require external nutrients, as they lack natural reserves.
- Both symbiotic and asymbiotic methods can be used for germination.
- Creating an appropriate germination medium is essential for orchid seed growth.
- Patience and attention to detail are critical throughout the propagation process.
- Successful cultivation can lead to a diverse array of orchid blooms.
Understanding the Delicate Art of Orchid Seed Propagation
Embarking on the journey of orchid seed propagation is akin to becoming a custodian of one of nature’s most exquisite treasures.
These floral gems rely on cultivation processes that diverge from standard horticultural practices, with a level of complexity and finesse that piques the curiosity and passion of plant enthusiasts worldwide.
When considering orchid seeds for sale, a prospective grower must first grasp the nuances of orchid seed viability and the methodologies that enable these minute life forms to flourish.
Asymbiotic Germination: Flasking Your Way to Success
Unlike their plant kingdom counterparts, orchid seeds are devoid of the self-sustenance offered by nutrient reserves. This renders them essentially invisible to the naked eye, and, consequently, the traditional path of sowing and patient waiting bears no fruit with these delicate entities.
It’s here that the art of asymbiotic germination shines, a laboratory-akin process termed ‘flasking.’ The essence of flasking is the careful introduction of orchid seeds to a sterile, nutrient-fortified agar substrate.
This agar acts as a cradle of life, imparting the essential nourishment and structure required for the orchid seedlings to embark on their developmental voyage.
Symbiotic vs. Asymbiotic Germination: Methods Compared
For those indulging in the nuances of orchid seed culture, the dichotomy of symbiotic and asymbiotic germination presents a choice rooted in tradition versus control. Symbiotic germination dances to the evolutionary tune orchestrated by nature, wherein mycorrhizal fungi collaborate with orchid seeds to spark life within the confines of the natural soil ecosystem.
This method harnesses the mutualistic bond between plant and fungi, a waltz of molecular give-and-take which, despite its natural charm, unfolds unpredictably and thus is usually left to the vigilance of specialized laboratories.
Meanwhile, the asymbiotic approach, with its sterile and measured protocol, offers the orchid cultivator a shield against the vagaries of infection and inconsistency.
| Germination Method | Environment | Nutrient Source | Risk of Infection | Control Level |
|---|---|---|---|---|
| Symbiotic | Natural soil | Mycorrhizal fungi | High (depending on soil conditions) | Low |
| Asymbiotic (Flasking) | Sterile laboratory or home setup | Agar medium | Low (if sterile procedures are followed) | High |
Exploring the Orchid Lifecycle in Propagation
The lifecycle of an orchid, from a seed to a blooming spectacle, is a path less traversed and poorly understood by those less inclined towards botanical endeavors.
Orchid seed sowing marks the inception of this odyssey, launching the seed into a rigorously controlled milieu that seeds of lesser fineness could only dream to experience.
As a cultivator, overseeing the saga of an orchid’s growth, from a minuscule speck to a seedling claiming its stake in a pot, instills a sense of wonder at nature’s intricate complexity, a process enlivened by each successful emergence of orchid seedlings capable of capturing the admiration and hearts of all who bear witness.
The Essential Supplies for Orchid Seed Propagation
Embarking on the journey of orchid seed growing is a fascinating venture, although one that comes with its unique set of challenges. Understanding what supplies you need right from the get-go can be a game-changer for your growing success.
Unripe orchid seed pods are the starting point, harvested before they split open to ensure the seeds are clean and uncontaminated. Continued care with the right orchid fertilizer becomes critical once your seeds begin to sprout.
Patience, precision, and the proper tools are at the heart of growing orchids from seed. It’s not so much about having a green thumb as it’s about meticulous cultivation and care.
Creating a sterile workspace cannot be overstated, it’s essential for preventing the fungal infections and bacteria that can devastate delicate orchid seedlings. Hence, a glove box or similar setup is necessary alongside sterilization agents such as bleach and alcohol.
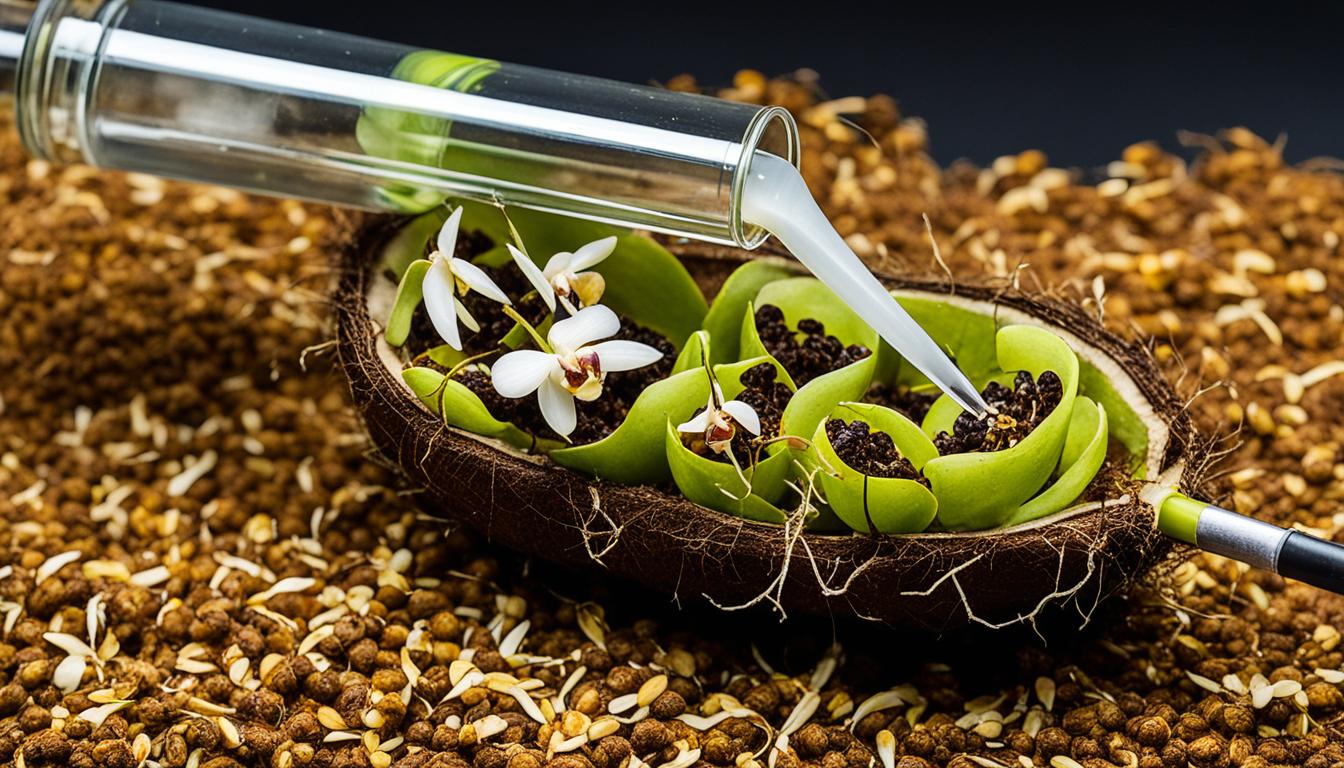
Also on your tools list, surgical-grade items like tweezers, a scalpel, and syringes will serve you well for handling the seeds and media.
After sterilizing the equipment, the next step involves preparing and pouring an agar medium. This nutrient-rich gelatinous substance will support your orchid seeds throughout the germination phase.
But remember, the process doesn’t stop at germination; it’s just as important to sustain your emerging orchid seedlings with an appropriate fertilizer tailored for post-germination nourishment.
Let’s take a look at an essential supplies checklist:
- Unripe orchid seed pods
- Distilled water for rinsing and preparing solutions
- Bleach and alcohol for sterilization
- Sterile environment (such as a glove box)
- Scalpel, tweezers, and syringes
- Agar media for seed sowing
- Specialized orchid fertilizer for seedling growth
Organizing these supplies means you’re well on your way to successfully cultivating your own orchids from scratch. What follows is not just the sprouting of seeds but the growth of your expertise as you tend to these exquisite blooms.

Now, here’s a detailed breakdown of the tools and materials required for each stage:
| Stage | Tools/Materials | Purpose |
|---|---|---|
| Preparation | Glove box, bleach, alcohol, distilled water | Ensuring a sterile environment and equipment |
| Seed Sowing | Agar media, sterilized tweezers, syringes | Cultivating orchid seeds in a controlled, nutrient-rich setting |
| Post-Germination | Orchid fertilizer, greenhouse setting, labels for tracking | Nourishing and monitoring the growth of orchid seedlings |
Whether you’re a hobbyist or a seasoned grower, aligning your endeavor with these indispensable tools and materials, represents a significant stride towards nurturing and witnessing the awe-inspiring development of orchids from their very inception.
Creating the Optimal Environment for Orchid Seeds to Thrive
Learning how to propagate orchid seeds successfully begins with understanding the intricate balance of environmental elements that these exquisite plants require.
As an avid gardener, it’s my pleasure to share the necessary conditions for optimal orchid seed germination. These elements are not only crucial during the initial stages but also support the ongoing development of strong and healthy orchid plants.
Temperature and Lighting: Setting the Stage for Growth
Maintaining the correct temperature is a critical component of the orchid seed germination process. I strive for a consistent range that falls comfortably between 10°C (50°F) and 30°C (86°F), closely mirroring the natural warmth orchids would experience in their native habitat.
Lighting also plays an indispensable role as orchids thrive under indirect sunlight or well-diffused artificial light, avoiding the harsh exposure that could damage delicate seedlings.
If you’d like to learn more about general orchid care and their Temperature and Lighting requirements, then check out my article: Orchid Temperature and Humidity Control Techniques

Moisture and Humidity Control for Healthy Orchid Seedlings
In my experience, humidity is the silent ally of moisture when it comes to nurturing orchid seeds. An environment reminiscent of a tropical climate, with humidity percentages hovering around 60 to 70 percent, encourages healthy germination.
While many believe that more water equates to better growth, the key is actual moderation and ensuring proper drainage. I often opt for rainwater when available, as it is free from chemicals that can stress the young seedlings.
If you’d like to learn more about general orchid care and optimal Moisture and Humidity requirements, then check out my article: Orchid Temperature and Humidity Control Techniques
Promoting Air Circulation to Mimic Natural Conditions
One aspect often overlooked in the germination process is the importance of air circulation. While orchids don’t fare well with strong winds, a gentle flow of air mimics the breezes of their natural environments, helping prevent fungal diseases and promote stronger growth. I always ensure that my propagation area allows for a soft but consistent flow of air around the developing orchids, contributing to their resilient growth and vitality.
If you’d like to learn more about general orchid care and Air Circulation, then check out my article: Orchid Air Circulation and Ventilation Tips
Orchid Seed Propagation: Step-by-Step Guide to Growing Your Orchids
Embarking on the journey of growing orchids from seeds can seem daunting, but with a clear, step-by-step guide, even the novice gardener can achieve success.
As someone deeply immersed in the horticultural arts, I understand the intricate details that can make or break the process of germinating orchid seeds.
Here’s a comprehensive outline detailing each essential stage for aspiring orchid cultivators.
Step 1: Seed Sterilization
- Gather mature orchid seeds.
- Use a hydrogen peroxide solution to sterilize and prevent infection.
- Store sterilized seeds securely to maintain their viability.
Step 2: Preparing the Agar Medium
- Measure specific ingredients to create a nutrient-rich medium.
- Mix the ingredients under sterile conditions to avoid contamination.
- Pour the medium into sterile containers, ready for sowing.
Step 3: Creating a Sterile Environment
- Sterilize tools and workspace with heat or a bleach solution.
- Ensure a clean work area to protect the delicate seeds from pathogens.
Step 4: Orchid Seed Sowing
- Carefully place the sterilized seeds onto the agar.
- Seal the containers to create a controlled environment for germination.
- Monitor for signs of swelling and protocorm development.
Step 5: Germination Period
- Wait patiently as seeds vary in germination times based on species.
- Adjust conditions as necessary, depending on the orchid variety.
Step 6: Seedling Care and Transplanting
- Once seedlings are large enough, start the meticulous maintenance regime.
- Eventually, transplant individual seedlings to their own pots.
- Nurture each plant as it grows from a protocorm to a mature orchid.
Using these guidelines, the process of orchid seed sowing becomes less mystified and more of a precise science blended with an art form.
Remember, the key to success lies not only in following these steps but also in cultivating the patience and dedication that is just as important as the physical care you provide to your growing orchids.

Conclusion
Embarking on the journey of orchid seed propagation is to immerse oneself in a world of meticulous care and enduring patience. As someone with a passion for the natural marvel of these ethereal blooms, I can attest to the journey’s rewards, though it often spans several years.
Whether cultivating a favored Phalaenopsis or delving into the rarities of Paphiopedilum, every orchid species presents a unique timeline of maturation, each influenced by an array of growth conditions and the tender care we provide.
Patience is Key: The Timeline of Orchid Maturation
From the initial germination within their sealed flasks to the crucial stages of deflasking and transferring each fragile seedling to its pot, orchid seed culture is a testament to the slow art of horticulture.
Throughout the process, I find that there’s an intrinsic beauty in observing the slow unfolding of life, as each minute seed inches towards its potential.
My role, as both observer and caretaker, requires a balanced hand to ensure that these emerging orchid seedlings are nurtured to full bloom in their own time.
Making Magic Happen: The Reward of Growing Orchids from Seeds
The true magic lies in the transformation, a process that begins with an almost imperceptible orchid seed and culminates in the breathtaking beauty of a fully formed orchid bloom.
The reward of seeing orchid seed culture succeed is magnified by the knowledge that it’s a result of personal dedication and an unwavering commitment to the craft.
For fellow enthusiasts aspiring to grow robust orchid seedlings, it is the dedication to the craft that turns the tiny speckles of possibility into thriving orchid plants, gracing our spaces with their unmatched splendor.
FAQ
How do you propagate orchid seeds?
Orchid seeds can be propagated through two primary methods: symbiotic and asymbiotic (flasking). Symbiotic propagation relies on the seeds forming a partnership with mycorrhizal fungi to access nutrients, while asymbiotic propagation involves germinating the seeds in a sterilized, nutrient-rich agar medium under controlled laboratory-like conditions.
What is orchid seed germination?
Orchid seed germination is the process by which orchid seeds develop into protocorms, the first stage of an orchid seedling’s life, before eventually growing into mature plants. This process can be done symbiotically in nature or asymbiotically (in vitro) using a flasking method with a nutritive agar medium.
Can I sow orchid seeds at home?
Yes, it is possible to sow orchid seeds at home, although it requires a clean and sterile environment to prevent contamination. A glove box or a laminar flow hood can be used to create a sterile workspace, and other sterile tools and materials are needed for sowing the seeds onto a prepared agar medium.
How long do orchid seeds take to germinate?
The time it takes for orchid seeds to germinate can vary widely depending on the species and the conditions of germination. Some seeds may begin to show signs of growth within weeks, while others can take several months to a year or more to germinate.
Where can I find orchid seeds for sale?
Orchid seeds are available for purchase from specialty plant nurseries, botanical gardens, online marketplaces dedicated to orchids, and orchid society sales or auctions. Make sure you’re buying from a reputable source to ensure the seeds’ viability.
What are the signs of successful orchid seed germination?
Successful orchid seed germination is marked by the development of protocorms, which are small, round structures that emerge from the seeds. As these protocorms grow, they will eventually produce leaves and roots, signaling the progression towards mature orchid seedlings.
How do I know if my orchid seeds are viable?
Viability in orchid seeds can be challenging to determine without sowing and attempting to germinate them, as they do not possess traditional indicators such as size and weight. Seeds that are collected from healthy seed pods shortly before they would naturally disperse are usually viable. In some cases, a viability test can be conducted using tetrazolium chloride to assess if the seeds are alive.
What is the best way to maintain orchid seedlings?
After germination, orchid seedlings should be carefully maintained with proper light, temperature, and humidity levels. They need to be gradually acclimated to less sterile conditions before being moved to individual pots. Fertilizing should be introduced slowly with a diluted orchid fertilizer to avoid overfeeding.
When should orchid seeds be harvested for propagation?
It’s best to harvest orchid seeds just before the seed pod naturally splits open, as mature seeds within unripe pods are most suitable for propagation. Harvest times can vary greatly between species, so it’s important to monitor the seed pods and plan the collection accordingly.
Why is a sterile environment so important for orchid seed sowing?
A sterile environment is crucial for orchid seed sowing to prevent fungal and bacterial contaminations, which can quickly destroy the minute orchid seeds and prevent germination. This is why cultivation in laboratory conditions or using a sterile glove box at home is recommended for successful orchid seed culture.
What is flasking in orchid seed propagation?
Flasking is an asymbiotic method of orchid seed propagation where seeds are sown in sterilized flasks containing a special agar nutrient medium. This technique provides the seeds with the necessary nutrients and hormones for germination and the initial stages of growth in a controlled, contaminant-free environment.
Can I use tap water for my orchid seed culture?
It is not recommended to use tap water for orchid seed cultures because it may contain impurities and varying levels of chlorine and minerals that can affect seed germination. Distilled water or rainwater is preferred as it is free from these impurities and provides a more controlled medium for the seeds.
Leave a Reply