Among the myriad of plant enthusiasts across the country, an astonishing 75% will grapple with the delicate process of repotting an orchid at least once.
This stat not only underscores the popularity of these exotic flowers but highlights how pivotal understanding orchid root care is to maintaining their beauty.
Armed with an expert Orchid repotting guide and a systematic repotting orchids step-by-step approach, I’ve navigated these waters successfully and so can you.
The serendipitous moment for this undertaking usually surfaces in the fresh breath of spring, where new growth whispers the need for a changed habitat.
Gazing at your orchid, you might notice an upward surge, robust roots striving for freedom, indicating it’s high time for repotting.
My experience with these vibrant flora has taught me the importance of timely intervention, dodging potential root rot, and ensuring the continued splendor of your beloved blooms.
Key Takeaways:
- Spring, a period of awakening, is the paramount season for repotting, aligned with orchids emerging from dormancy.
- Repotting orchids is not merely routine care; it’s a vital measure against root rot and for nutrient replenishment.
- Root observation is key; be alert for signs that dictate the need for a repot, such as visible crowding or degraded medium.
- A balance of gentle handling and firm resolve is necessary to maintain the integrity of delicate orchid roots during repotting.
- Choosing the correct time for repotting can increase the likelihood of post-repotting success, manifesting in luscious blooms and robust health.
- My stepwise guide can embolden even the most hesitant gardener to undertake this essential horticultural practice with confidence.
Understanding Orchid Repotting Necessities
As an avid cultivator of orchids, my observations and experiences have highlighted a few critical aspects of orchid care, particularly the importance of timely repotting.
A vigilant gardener must be adept at discerning the subtle yet clear signals an orchid gives to convey its readiness for repotting, as well as ensuring the procedure is carried out during the most advantageous time of year to bolster orchid root health.
Let’s delve into the nuances of recognizing these repotting signals and best practices for timing, all in the pursuit of nurturing a thriving orchid.
Signs It’s Time to Repot Your Orchid
The perennial query amongst orchid enthusiasts is knowing precisely when to repot. It’s a quintessential skill, recognizing the tell-tale indicators of an orchid’s need to transition into a new abode.
Essential signs include roots striving for freedom as they escape their confines, a potting mix that has lost its vigor and decomposes, and the simple passage of time, generally between one to two years.
Vigilance in these matters is more than a mere suggestion; it is a vital component of orchid care.
Choosing the Right Season for Repotting
Timing is everything, as the age-old adage goes, and this could not be more accurate when it comes to repotting orchids.
Spring emerges as the best time to repot orchids, aligning with the natural cycle of resurgence as the orchid awakens from dormancy and ushers in a period of robust growth.
This seasonal transition offers a compelling testament to the readiness of the orchid for a change of scenery and invites the ideal conditions for revivified roots to take hold with gusto.
The Importance of Repotting for Orchid Health
Repotting transcends the mere act of transferring an orchid to a new vessel, it is an act rooted in the preservation and enhancement of the plant’s overall vigor.
The removal of an orchid from old, compacted media is tantamount to liberating its roots from suffocation, thus allowing it to breathe anew and imbibe fresh nutrients.
This intervention is undoubtedly a cornerstone of maintaining the radiant health of an orchid, ensuring its floral display remains as breathtaking as nature intended.
| Indicator | Details | Action |
|---|---|---|
| Root Overgrowth | Roots are visibly crimped or erupting from the pot’s confines | Time to upgrade to a larger pot or refresh the current one |
| Potting Mix Breakdown | The mix becomes dense, loses structure, and lacks drainage | Replace mix with a fresh, breathable medium |
| Time Elapsed | One to two years since last repotting | Annual or bi-annual inspection for potential repot |
With the table above serving as a guideline, an informed grower approaches the repotting process with confidence and the assurance that their orchids will relish in the care provided.
As I continue on my botanical journey, I not only share my insights but also encourage fellow orchid enthusiasts to tend to their cherished plants with attentiveness and persistent learning.
Preparing for the Repotting Process
As an avid orchid enthusiast, I understand that successful repotting starts with careful preparation. Crucial to this process is a collection of specific orchid repotting materials.
The essential items to gather comprise fresh supplies, each playing its role in supporting the transition of your prized orchid into a new container.
Gathering Essential Supplies
To embark on your orchid repotting journey, having the right tools at hand is non-negotiable.
I ensure my workspace is ready with sterile pruners, scissors, and gloves. Protection for your hands is important, especially when dealing with potentially sharp orchid roots.
Moreover, a blunt instrument such as a dowel is indispensable for tucking the bark mix around the roots without harm.
Identifying the Ideal Pot Size and Material
Orchid pot selection is not about esthetics alone; functionality is key. A new pot, preferably one size larger than the old one, is ideal to accommodate growth.
In my experience, a clay pot is excellent as it supports breathability, helping the roots absorb necessary moisture and air.
Understanding the Role of Fresh Bark Mix
The fresh bark mix for orchids is essential, it mimics the orchids’ natural mounting on trees. It should be loose and well-aerated, providing the perfect medium that ensures healthy root growth and proper drainage.
The right bark mix will support your orchids’ roots while also preventing waterlogging, which can be detrimental to the plant’s well-being.
Below is a table of supplies that I’ve found invaluable for the repotting process, which I believe should form part of any orchid owner’s toolkit.
| Supply | Usage | Reason for Choice |
|---|---|---|
| Sterile Pruners | Trimming Roots | Prevents disease transfer and ensures clean cuts |
| Scissors | Cutting Old Potting Medium | Allows for precision and avoiding damage to roots |
| Gloves | Comfortable Working | Protects hands from cuts and irritation from the medium |
| Clay Pot | Repotting Orchids | Provides breathability and moisture regulation |
| Bark Mix | New Potting Medium | Ensures proper drainage and support for roots |
| Dowel | Adjusting Potting Medium | Allows gentle positioning of the medium without damaging roots |

In conclusion, my preparation for orchid repotting cements the foundation for a thriving plant.
By choosing the correct orchid pot selection and investing in the right orchid repotting materials and bark mix for orchids, you’re not only securing the future flourishing of your orchids but also enhancing your joy in nurturing these exquisite beings.
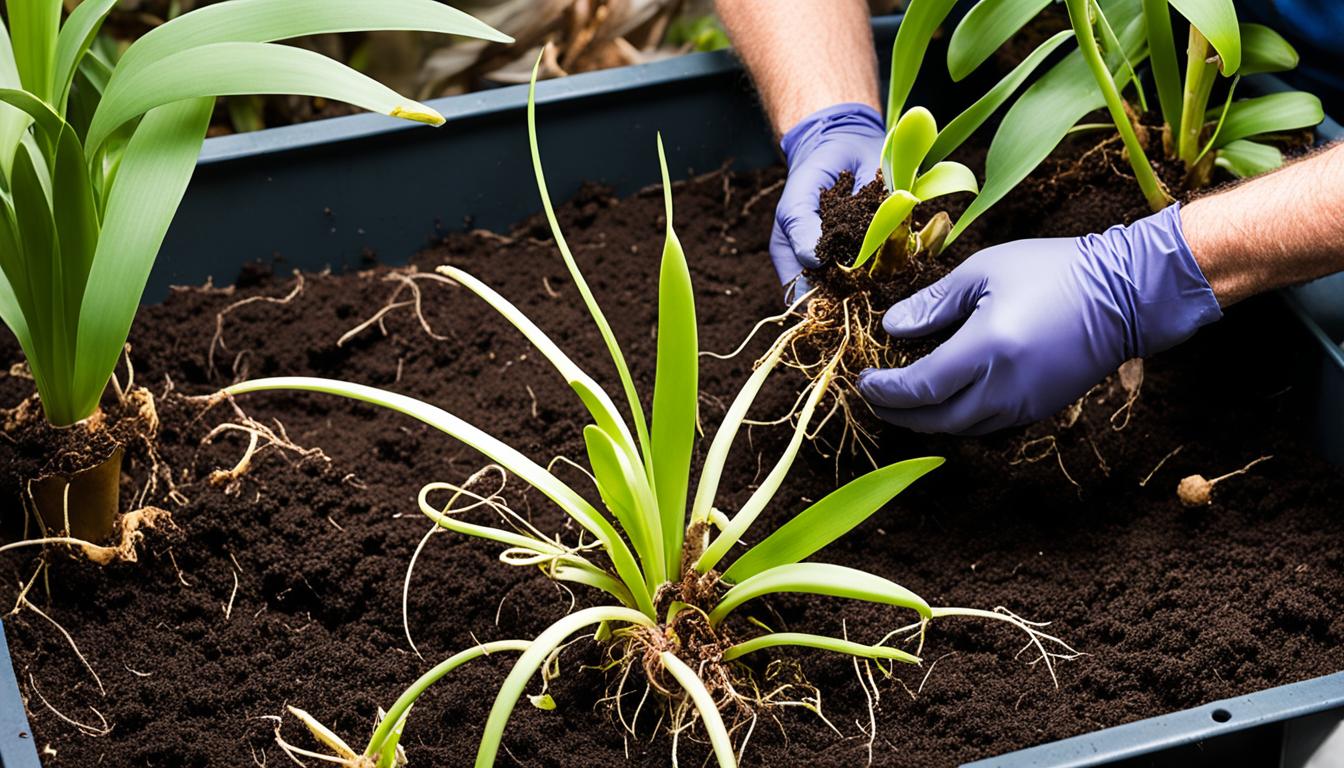
The Delicate Task of Orchid Root Removal
As a committed orchid enthusiast, I understand that the process of releasing orchid roots from their former home requires patience and a steady hand.
It’s crucial to approach this task with care to maintain the integrity of the orchid’s delicate root system.
Here, I’ll share the techniques I’ve honed to ensure successful root removal and the continued well-being of these beloved plants.

Gently Releasing Roots from the Old Pot
The key to releasing orchid roots is gentle persuasion rather than force. When I encounter roots clinging to the pot’s edges, I find that massaging the pot’s sides or carefully inserting a dull knife between the pot and the rootball can ease the tension.
This method minimizes root damage and prepares the plant for a much-needed fresh environment.
Proper Techniques for Soaking Orchid Roots
Dealing with a stiff and dry rootball, I’ve learned that soaking orchid roots can make a world of difference.
I place the plant in a basin of lukewarm water, allowing the roots to absorb moisture gradually.
This essential step helps to soften and untangle roots, making the task of repotting much smoother and less stressful for the orchid.
How to Handle Potbound Orchid Roots
At times, I encounter orchids that are potbound, their roots having exhausted available space.
Carefully loosening the tightly wound roots and rinsing away the old compost not only frees the plant but also reestablishes vital air spaces for the roots.
Here’s a simple guide I follow when dealing with potbound orchids:
| Step | Procedure | Purpose |
|---|---|---|
| 1 | Examine the root condition | To evaluate the severity of rootbound issue |
| 2 | Moisten the root ball | To ease root untangling and removal from the pot |
| 3 | Use tools if necessary | To gently pry away roots from the pot without damage |
| 4 | Rinse the roots | To clear debris and old potting mix to ensure health |
| 5 | Prepare for repotting | To guide the transition into a new, appropriately sized pot |
Through these careful steps, I not only preserve the vitality of the orchid’s roots but also set the stage for future growth and blossoming.
With each repotting, my appreciation for the delicate dance we perform in partnership with these exquisite plants grows ever stronger.
Examining and Trimming Orchid Roots
As I delve into the crucial stage of examining orchid roots, I cannot overstate the importance of identifying which roots require trimming.
During repotting, root examination is a vital step in sustaining an orchid’s health and vigor. I’m often on the lookout for healthy orchid roots, easily recognizable by their firm texture, white coloration, and pale green tips, these indicate robust growth.
Conversely, roots that appear soggy, black, or hollow signify decay and should be trimmed to maintain the plant’s overall vitality.

For the trimming process, I trust sterile pruners or scissors, ensuring they are clean to prevent the spread of any pathogens.
Each cut I make aims to remove only the damaged parts without disturbing the healthy root system. Patience and precision are key, as I carefully separate the old potting mix from between the roots to better assess their condition.
Once I’ve completed trimming orchid roots, I administer a thorough rinse to cleanse and rejuvenate the remaining root structure, preparing it for a fresh start in its new environment.
| Root Condition | Action Required | Outcome After Trimming |
|---|---|---|
| White with pale green tips | Retain root | Healthy growth continues |
| Dark or black | Trim damaged portion | Prevents potential rot spread |
| Soggy or hollow | Trim completely | Encourages new healthy roots |
| Firm and supple | No action required | Maintains system integrity |
Throughout this process, the importance of keen observation cannot be overstated. By ensuring that only the unhealthy roots are trimmed away, I help foster a resilient foundation for the orchid to thrive in the coming seasons.
This exacting care reflects my commitment to nurturing these exquisite plants, so they may reward us with their stunning blooms.
Orchid Roots Care: Replanting with Precision
As I delve into the intricacies of the orchid repotting technique, understanding the delicate phase of replanting orchids becomes paramount.
This stage of the process not only ensures their immediate well-being but sets the foundation for the long-term health and beauty of these intricate plants.
A critical aspect is rehoming the roots properly, a task that demands patience and precision.
Positioning Orchid Roots in Their New Home
Post-trimming, the anchoring orchid roots require a new habitat that mimics their natural conditions. I carefully spread the roots evenly across the new pot’s surface, ensuring none are overly bent or forced into the space.
It’s a balancing act to offer support without overly constraining these life-sustaining tendrils.

Using the Right Medium for Replanting
Selecting an appropriate medium is a critical step in the repotting process, so I always reach for a high-quality bark mix, which I find best replicates the orchid’s native environment, promoting robust root growth.
The medium has to be loose enough to improve air circulation yet firm enough to support the plant’s weight.
Securing Orchid Stability in the New Pot
To anchor the orchid successfully, I diligently add the bark mix around the roots, using care not to pack it too tightly, which could hamper the roots’ ability to breathe and absorb moisture.
Once the orchid is comfortably settled, using a dowel to gently tap down the medium helps secure the plant in place, ensuring the foundation is set for a thriving future.
Maintaining the Right Environment Post-Repotting
After the delicate process of repotting, protecting your orchid’s health requires precise care to acclimate it to its new surroundings. Just as it is with our own recovery after a significant change, providing the right conditions is crucial for the orchid’s adjustment and growth.
This involves understanding when to water the orchid, adjusting light and temperature for optimum growth, and avoiding common care mistakes that can jeopardize your orchid’s well-being.

When and How to Water After Repotting
I’ve learned that it’s best to remain patient with watering orchids shortly after repotting. To stimulate the roots to search for moisture and grow into the fresh medium, orchid care after repotting includes withholding water for the first week or two.
When it is time to hydrate, doing so carefully ensures that the roots receive moisture without becoming waterlogged, which could lead to rot.
Providing Optimal Light and Temperature
Positioning an orchid in bright, indirect light characterizes the optimum orchid environment for post-repotting care. It’s comparable to healing in a well-lit, comfortable room.
Ensuring the orchid has ideal light exposure without direct sunlight is a balancing act essential to their health.
Additionally, I maintain a consistent temperature range, mimicking the tropical climate from which orchids naturally thrive, warm days, and cooler nights.
Avoiding Common Repotting Mistakes
I frequently notice common missteps in orchid care after repotting and have made a few myself over time. Overwatering is a typical error; it’s a habit we must curb to prevent root rot.
Another mistake to avoid is exposing the orchid to drafts or fluctuations in temperature too soon after repotting, as stability is key during the initial adjustment period.
| Environment Factors | Ideal Conditions | Common Mistakes to Avoid |
|---|---|---|
| Light | Bright, indirect sunlight | Direct sunlight leading to leaf burn |
| Watering | Withhold water initially, then water sparingly | Overwatering, leading to root rot |
| Temperature | Daytime warmth with cooler nights | Extreme fluctuations and drafts |
| Humidity | Consistent moderate humidity | Allowing environment to become too dry |
| Air Circulation | Gentle air flow | Poor ventilation causing stale air |
The Distinct Needs of Epiphytic Orchids
Epiphytic orchid care demands an understanding of their unique structure and growth patterns. As someone who’s deeply immersed in the nuances of orchid cultivation, I’ve observed that successful growth hinges on acknowledging the specialized needs of these stunning plants.
Aerial root adaptation is particularly crucial as these roots not only absorb moisture and nutrients but also anchor the plant to its host in nature.
Embracing these adaptations ensures our epiphytic friends flourish under our care.
Recognizing Adaptations in Aerial Root Orchids
The striking feature of these orchids is their aerial roots, which seem to reach out into the air. I’ve learned that this is their ingenious adaptation to cling to trees and rocks, deriving sustenance from the air and occasional debris.
In domestic settings, replicating this environment leads to thriving plants. So when I think about specialized orchid repotting, it’s about more than just the pot, it’s about mimicking their natural habitat.

Special Considerations for Monopodial and Sympodial Types
Moving onto the various growth habits, I’ve come to appreciate that monopodial orchids like the popular Phalaenopsis grow upward, adding leaves to the crown as their roots spread below.
Conversely, sympodial orchids sprawl sideways, forming new pseudobulbs as they go. These distinctions significantly affect my repotting strategies, with sympodial types often requiring larger spaces to explore than their monopodial counterparts.
Repotting Strategies for Orchids with Air Roots
I’ve honed a method that respects the fragile nature of epiphytic orchid roots. The process begins with choosing the right medium, one that’s loose and chunky, mimicking decayed wood and leaf litter they’d naturally cling to.
Then, gently tucking the roots into this medium without compacting too much is vital. Even after repotting, the aerial root adaptation should be visible, extending above the medium to absorb moisture and breathe.
| Type | Growth Habit | Repotting Frequency | Medium Considerations |
|---|---|---|---|
| Monopodial (e.g., Phalaenopsis) | Vertical growth | Less frequent, depends on root volume | Stable, sphagnum-based mix for moisture |
| Sympodial (e.g., Cattleya) | Horizontal growth | More frequent, as new growths appear | Loose, bark-based mix for airflow |
Whether it’s the high-canopied rainforest or my own backyard greenhouse, the thrill of nurturing these exotic beauties never diminishes.
With each specialized orchid repotting session, my appreciation for their remarkable adaptations deepens, as does my commitment to providing the utmost epiphytic orchid care.
Conclusion
In my journey through the multifaceted world of nurturing orchids, I’ve come to understand that successful orchid repotting is nothing short of an essential ritual.
It’s a delicate process that fortifies the heart of these plants, and their roots, which are fundamental to their survival and flourishing. Each step, from selecting the optimal season to exercising precision in handling the roots, is a testament to the meticulous care these magnificent plants demand.
Particularly for those engaging in epiphyte orchid cultivation, repotting is a time to honor the unique traits of their cherished companions, ensuring that every aerial root is taken into account.
Throughout my exploration, I prioritize orchid root maintenance, empowering these plants to continue their growth with vigor and vitality.
The attention does not wane post-repotting; providing a conducive aftercare environment is crucial.
This involves shielding the freshly potted orchids from stress factors and nurturing them into a state of stability.
Adhering to these practices promises a habitat where orchids not only survive but thrive, radiating exuberance with their enchanting blossoms.
Finally, repotting is not just a matter of routine; it’s a dance with nature, a holistic approach that melds the technical with the intuitive.
For enthusiasts and novices alike, mastering the art of repotting paves the way for a harmonious interaction with these extraordinary plants.
Guided by knowledge, patience, and a genuine passion for botanical beauty, we can all enjoy the splendor of healthy orchids gracing our homes with their spectacular floral displays.
FAQ
When should orchids be repotted?
Orchids should be repotted in spring as they emerge from their dormant cycle and show signs of new growth. This is typically the best time because the orchid is entering its active growing phase and can handle the stress of repotting better.
How do I know if it’s time to repot my orchid?
It’s time to repot your orchid when you notice the roots overcrowding the pot, the potting medium decomposed, or it’s been one to two years since the last repotting. Also, if the orchid starts lifting out of the pot or the roots are peeking through drainage holes, it’s time for a new pot.
What supplies do I need for repotting orchids?
You’ll need fresh bark mix, a new pot that is one size larger than the current one, sterile pruners or scissors, gloves, and a blunt instrument such as a dowel to help position the orchid and media in the new pot.
What’s the proper way to remove an orchid from its pot?
The roots should be released gently from the old pot. If they are sticking, you can lightly massage the pot or use a dull knife to loosen the roots. If the rootball is stiff, soaking it in water may be necessary to ease the untangling process.
How do I properly examine and trim orchid roots during repotting?
Inspect the root system for any black, hollow, or soggy roots and trim these away with sterilized pruners or scissors. Healthy roots are typically white with pale green tips. After trimming, rinse the roots to remove any old potting mix and refresh the orchid.
How do I secure orchid stability in its new pot?
After positioning the orchid in the new pot, use a high-quality bark mix to fill around the roots without compacting it too much. You can use a dowel to settle the mix properly and ensure that the roots are spread out naturally for stability and good air circulation.
What care do orchids need immediately after repotting?
After repotting, withhold watering for a week or two to encourage the orchid to grow new roots. Place the orchid in an environment with good air circulation, bright indirect light, and maintain optimal temperature and humidity to prevent transplant shock.
Are there different repotting considerations for epiphytic orchids?
Yes, epiphytic orchids, particularly those with aerial roots like Phalaenopsis, have unique requirements. They need to be treated with special attention to their root adaptations and may not require pot upsizing as often as other types.
How often should epiphytic orchids be repotted?
The repotting frequency for epiphytic orchids depends on the type. Monopodial orchids may need less frequent repotting compared to sympodial orchids. However, the general rule is to repot when the potting mix breaks down, which is usually every one to two years.
What are common mistakes to avoid when repotting an orchid?
Common repotting mistakes include overwatering immediately after repotting, which can lead to root rot, not using a sterilized cutting tool which can introduce infections, and using an inappropriate potting medium that doesn’t provide adequate drainage and air circulation.
Leave a Reply