As a passionate gardener, I’ve discovered the joy and satisfaction of expanding my orchid collection through orchid back bulb propagation. This beginner’s guide to orchid back bulb propagation will share practical insights that’ll help you master this rewarding technique.
I’ll take you through the essential steps from identifying suitable back bulbs to the conditions needed for successful propagation.
Whether you’re curious about how to propagate orchids from back bulbs or seeking to refine your orchid propagation techniques, there’s much to learn from the world of these enchanting flowers.
Key Takeaways
- Understanding the basics of back bulb propagation for successful orchid multiplication.
- Selecting the right orchid species is crucial for propagation from back bulbs.
- Creating a conducive environment for orchids to thrive is essential in the propagation process.
- Patience is key as it may take time for back bulbs to develop into mature, flowering orchids.
- Maintaining cleanliness and proper aftercare will prevent disease and ensure healthy growth.
- Meticulous attention to the humidity and temperature encourages the growth of new shoots and roots.
Understanding Orchid Back Bulb Propagation
As someone passionate about orchids, I find back bulb propagation to be a remarkable journey from dormancy to vibrancy.
This technique taps into the dormant potential within orchids’ back bulbs, enabling them to spring to life and flourish under the proper conditions.
Below, I will delve into the fascinating world of back bulb propagation and share some essential tips for successful orchid propagation that I’ve learned along the way.
What is Back Bulb Propagation?
The back bulb propagation process is a testament to nature’s resilience, allowing garden enthusiasts like me to kickstart a new life cycle from the old.
Back bulbs are the mature pseudobulbs of an orchid that have already flowered. Although they might appear lifeless, these pseudobulbs serve as storage vessels for nutrients and water.
With the right care, they can regenerate, giving rise to new roots and shoots. It’s an orchid propagation method that is as economical as it is fulfilling, bypassing the need for advanced laboratory setups.
The Benefits of Propagating Orchids from Back Bulbs
What enamors me about propagating orchids from back bulbs is more than just the scientific aspect, it’s about sustainability and rejuvenation. This approach reuses plant parts that are often discarded, making the most of every section of the orchid.
It also contributes to the plant’s health by lightening the load of an overgrown orchid, encouraging more vigorous growth. Indeed, the back bulb propagation process is a gift that keeps on giving.
Best Candidates for Back Bulb Propagation
In my experience, not all orchids are suited for the back bulb propagation method.
The ideal candidates are sympodial orchids, like Cymbidiums and Dendrobiums, which develop pseudobulbs capable of sprouting new growth from dormant ‘eyes.’
Here’s a table outlining some orchids that have proven to be excellent options for back bulb propagation:
| Orchid Type | Dormancy Indication | Suitability for Back Bulb Propagation |
|---|---|---|
| Cymbidium | Flowering completed, foliage yellowing | High |
| Dendrobium nobile | Canes mature, leaves dropped | High |
| Oncidium | Bulbs wrinkled and leafless | Moderate to High |
| Paphiopedilum | Fan of leaves dying back | Moderate |
Through this table, I hope to provide a clear starting point for fellow orchid enthusiasts on the lookout for suitable specimens in their collection to try out the back bulb propagation process and implement essential tips for successful orchid propagation.
It is crucial to ensure that every orchid undergoing propagation receives meticulous care for the best chance of flourishing into a stunning bloom.
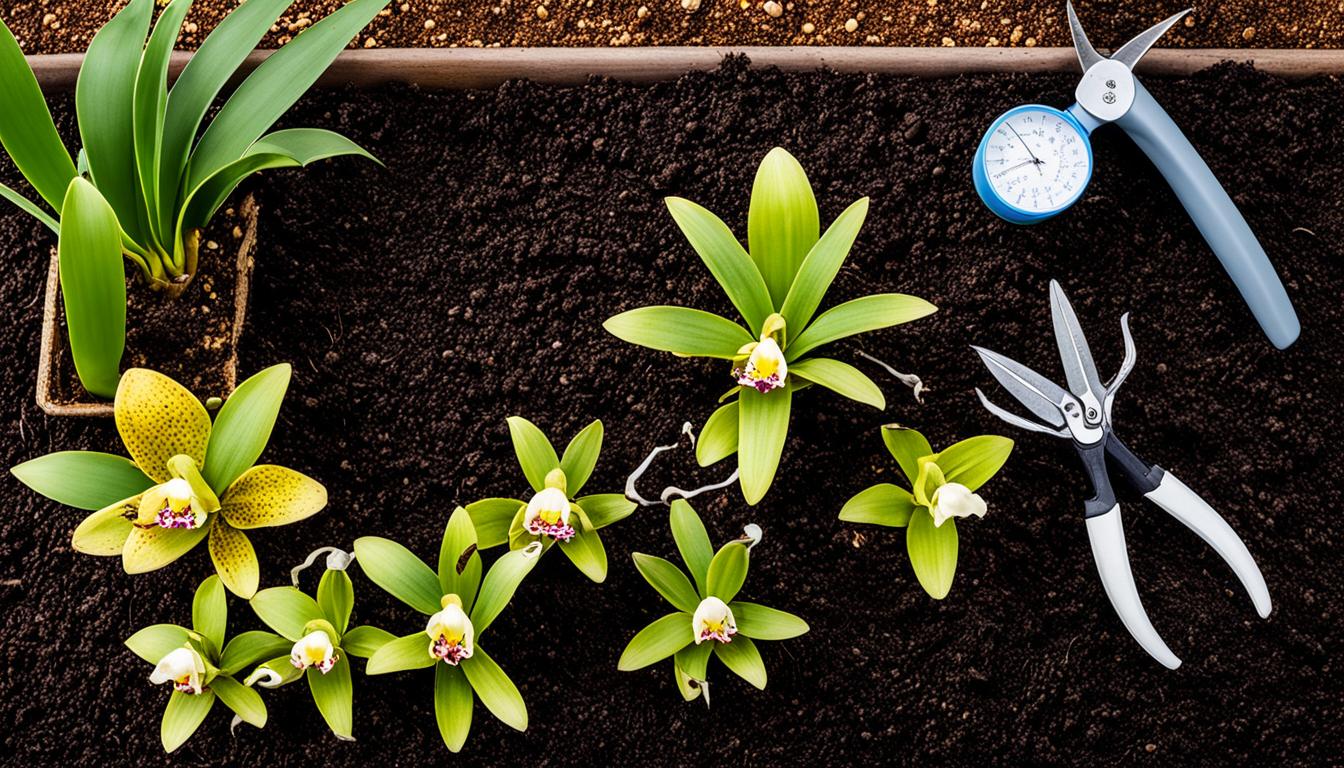
Essential Tools and Conditions for Propagation
When embarking on the journey of orchid back bulb propagation, the right tools and conditions are as critical as the actual steps taken.
In my experience, prioritizing the preparation of both materials and the environment lays the groundwork for successful propagation.
Selecting the Right Medium: The Role of Sphagnum Moss
Finding the ideal growing medium is tantamount to orchestrating the perfect start for your orchids. Sphagnum moss has proven to be highly effective due to its excellent water retention and aeration properties. It creates a conducive environment for the back bulbs to gradually awaken and develop roots.
Creating the Perfect Environment for Orchid Propagation
Orchids flourish under specific conditions that replicate their natural tropical habitat. A balance of humidity, warmth, and lighting is essential. Thus, I often recommend simulating a mini-greenhouse effect, an easy DIY project using common household items.

- Maintaining optimal humidity by enclosing the planting area with clear plastic, allowing for maintenance of moisture levels.
- Ensuring the back bulbs receive plenty of indirect light, since direct sunlight can be harmful at this tender stage of growth.
- Making use of gentle warmth, such as placing the container above a fridge or using a heat mat, to stimulate growth.
Remember, clean tools and hands are paramount throughout the process to prevent the introduction of any potential pathogens to these sensitive beginnings.
| Essential Tool/Condition | Purpose | Best Practice |
|---|---|---|
| Sphagnum Moss | Growth Medium | Use fresh moss and fluff it lightly for optimal moisture and aeration. |
| Plastic Enclosure | Humidity Control | Create a mini-greenhouse with clear plastic containers to maintain high humidity levels. |
| Indirect Light | Simulate Natural Light Conditions | Position the setup in a location with bright, indirect sunlight avoiding direct rays especially during the hot midday. |
| Gentle Warmth | Stimulate Growth | Use a heat mat or place the setup in a naturally warm location, but not exceeding 77°F (25°C). |
By adhering to these best practices for propagating orchids from back bulbs, cultivators are setting the stage for new, vibrant growth.
Patience and precision during this step-by-step orchid back bulb propagation guide are your closest allies.
This precise setup, coupled with an attentive eye, can make all the difference in nurturing a back bulb to a blooming orchid.
Preparing Your Orchids for Propagation
Embarking on the journey of orchid propagation requires a careful preliminary step – the preparation of your orchids, particularly the back bulbs, which are key to successful cultivation.
Proper preparation not only ensures a higher success rate but also brings the immense satisfaction of watching a new plant emerge from a part that would otherwise be discarded.
Identifying Viable Back Bulbs
Finding the right candidates for back bulb division for orchids starts with identifying viable back bulbs. These are typically larger, plump, and possess one or more dormant ‘eyes’.
The back bulbs should feel firm to the touch and be free of any signs of decay or disease. Such healthy bulbs are the building blocks of new orchid plants and are integral to effective orchid propagation techniques.
Cleaning and Disinfecting Orchid Back Bulbs
Once you have selected the back bulbs, the next essential step involves cleaning and disinfecting them. I make sure to sterilize my cutting tools with alcohol or a flame before each cut, which helps prevent any potential disease spread.
It’s a critical precaution that upholds the essential tips for successful orchid propagation. After separating the bulbs, I also like to rinse them gently in a fungicide solution to add an extra layer of protection against pathogens.
Separation Techniques for Healthy Orchids
The act of separating back bulbs from the mother plant requires finesse and precision. I carefully cut through the rhizome, ensuring that I do not damage the bulbs or the mother plant.
Each bulb is then inspected for any residual plant material or roots that may need trimming before propagation. This meticulous approach to separation is necessary to prevent harm to the bulbs, paving the way for robust and healthy orchid growth post-propagation.

Orchid Back Bulb Propagation: A Step-by-Step Guide
As an orchid enthusiast, I’ve found orchid back bulb propagation to be both an art and a science. Let’s walk through the nuanced process together, so you can learn how to propagate orchids from back bulbs with confidence and precision.
The key to success lies in patience and meticulous attention to the environmental conditions your orchid requires for growth.

I always start by gathering the dormant back bulbs which have the potential for new life. Those without apparent ‘eyes’ can still be encouraged to grow; it simply takes creating the perfect conditions for them.
Below, I’ve detailed each crucial step to ensure you can undertake this journey towards a verdant future with these exquisite plants.
- Selecting Back Bulbs: Identifying healthy, dormant back bulbs is the foundation of successful propagation.
- Potting Medium: Sphagnum moss is my go-to substrate, providing essential moisture retention and aeration.
- Humidity: High humidity is vital, propelling dormant eyes into active growth phases.
- Temperature: Maintaining a stable, warm environment mimics the natural conditions orchids love.
- Patience and Care: Regular monitoring and adjustments are crucial, as each back bulb may have slightly different needs.
For those interested in the specifics of back bulb division for orchids, I’ve crafted the following table to help visualize the vital aspects of the propagation environment.
Tailor these parameters to coax even the most stubborn back bulb into a thriving orchid.
| Step | Action | Purpose | Tips for Success |
|---|---|---|---|
| 1. Preparation | Separate bulb from parent plant | To isolate the potential new plant | Use sterilized cutting tools to prevent infection |
| 2. Potting | Place in moist sphagnum moss | To stimulate root growth | Ensure the moss is damp, not waterlogged |
| 3. Environment | Create a mini greenhouse | To provide consistent humidity and warmth | Consider using a clear plastic container with air holes |
| 4. Monitoring | Check regularly | To adjust conditions as needed | Look for signs of growth or stress on the bulb |
| 5. Transition | Gradually introduce to less humid conditions | To acclimate the orchid to typical growing conditions | Step by step transition prevents shock |
Remember, the journey of orchid back bulb propagation demands your devotion. It may take several months for a back bulb to show signs of life, but witnessing the first sprout of a new plant is deeply gratifying. In the world of orchids, patience truly is a virtue.
Aftercare of Propagated Orchids
Once the delicate process of orchid propagation is complete, the focus turns to the essential tips for successful cultivation. Aftercare is crucial, as it will determine how well the propagated orchids adapt and grow.
Let me share my insights on cultivating these beauties successfully.
Maintaining Ideal Humidity and Light Conditions
One of the vital orchid propagation methods is to maintain high ambient humidity. Orchids thrive in moisture-rich environments, a condition easily mimicable with humidity trays or regular misting sessions.
In terms of lighting, keep the young orchids away from direct sunlight. Indirect light will prevent leaf burn and encourage healthy growth.

When and How to Water Your New Orchids
Knowing when and how to water is fundamental for back bulb propagated orchids. Water only when the sphagnum moss begins to dry, as over-watering can be detrimental.
I advise using lukewarm water to avoid shocking the tender roots, creating an environment for growth without the threat of root rot.
Transitional Care: From Propagation to Mature Plant
As the propagated back bulbs show new growth, it’s time for their transition. Move them to a pot with a well-draining orchid medium, placing the bulb’s base just above the medium’s surface to avoid moisture accumulation.
| Care Aspect | Recommendations |
|---|---|
| Light | Bright, indirect sunlight |
| Humidity | 60-70%, using trays or misters |
| Watering | When moss is dry to the touch; tepid water |
| Temperature | Maintain 70-80°F for optimal growth |
| Fertilization | Quarter-strength, balanced fertilizer monthly |
| Potting Medium Transition | When new growth appears, transfer to orchid medium |
If you’re interested in gaining a deeper understanding of orchid care, I invite you to explore my comprehensive articles covering the various aspects mentioned above. You can find them here:
Orchid Lighting Requirements: Sunlight and Artificial Light,
Orchid Temperature and Humidity Control Techniques,
Understanding Orchid Watering Needs: Frequency and Methods,
Choosing the Right Soil and Potting Mixes for Orchids,
Fertilizing Orchids: Types and Application Schedules.
Common Pitfalls and How to Avoid Them
As a seasoned grower, I’ve often witnessed an eagerness in novice gardeners to master how to propagate orchids from back bulbs. While the potential for growth and beauty is immense, certain common mistakes in orchid propagation can hinder progress.
Recognition and prevention of these pitfalls are as critical as the propagation steps themselves.
Issues in Moisture Regulation and Damping Off
Orchids have a notorious reputation for their finesse; too much love—in the form of water, can initiate the devastating condition known as damping off. This fungal nightmare preys upon the vulnerability of overwatered back bulbs.
The key to avoiding this is striking a delicate balance in moisture levels, an essential part of the step-by-step orchid back bulb propagation guide.
Let’s look at a practical analysis of moisture dos and don’ts:
| Moisture Management Action | Recommended Practice | Potential Pitfall to Avoid |
|---|---|---|
| Watering Frequency | Allow sphagnum moss to almost dry out between watering | Consistently soggy media leading to root rot |
| Humidity Control | Use humidity trays or enclosed containers | Excessive humidity causing fungal growth |
| Air Circulation | Ensure gentle airflow around the propagation area | Still air fostering the spread of pathogens |
Preventing Contamination and Disease Post-Propagation
Diseases and contamination are propagators’ banes and combating them starts with prevention. My go-to tactic is a rigorous sterilization of tools before each cut.
This not only hinders the transmission of unseen pathogens but also paves the way for healthy growth. Remember the saying: “An ounce of prevention is worth a pound of cure.”
Minimizing plant handling post-propagation is another simple yet effective strategy, as it reduces the chance of inflicting stress or introducing contaminants to vulnerable plantlets.
Remember, it’s not about avoidance but about appropriate action. By adhering to these guidelines, your orchids can escape the traps that ensnare the uninitiated and flourish under your careful watch.

Conclusion: Celebrating the Success of Your New Orchids
As I reflect on the thorough and delicate process of orchid back bulb propagation, I am filled with a genuine sense of accomplishment at the emergence of new growth.
The patience and attention to detail required in executing back bulb division for orchids are significant, but the outcome is profoundly rewarding.
For those who have diligently followed the beginner’s guide to orchid back bulb propagation, seeing the first signs of a budding orchid is a remarkable moment that symbolizes the cycle of life and rejuvenation within these stunning blooms.
Orchid back bulb propagation serves as more than just a technique for expanding one’s garden; it is a testament to the resilience and adaptability of these plants.
The journey from a dormant bulb to a vibrant, flowering orchid reinforces the crucial role that precise conditions and unwavering aftercare play in the success of such endeavors.
Those who embark on this path will gain not only a flourishing specimen but also an enhanced understanding and appreciation for the intricate beauty of orchids.
Ultimately, the process transcends mere cultivation—it is an exercise in stewardship, allowing each of us to partake in the legacy of orchid preservation.
As I celebrate the triumph of my newly propagated orchids, I am motivated to continue sharing this method of orchid back bulb propagation, empowering others to both cherish and propagate the diverse beauty of these plants for future enthusiasts to appreciate.
Common Pitfalls and How to Avoid Them
What is Back Bulb Propagation?
Back bulb propagation is a method of growing new orchid plants from the dormant or previously flowered pseudobulbs, often referred to as back bulbs. These back bulbs can develop new shoots and roots, eventually leading to a mature plant capable of flowering.
What are the Benefits of Propagating Orchids from Back Bulbs?
This form of propagation is beneficial as it uses plant parts that might otherwise go to waste, doesn’t require complex equipment, and can help rejuvenate an overgrown plant by dividing it for healthier growth. It’s also a sustainable way to expand an orchid collection.
What are the Best Candidates for Back Bulb Propagation?
Sympodial orchids, such as Cymbidiums and Dendrobium nobile, are suitable candidates since they produce pseudobulbs with dormant “eyes” that can potentially sprout new growth when given the right conditions.
What is the Role of Sphagnum Moss in Selecting the Right Medium?
Sphagnum moss helps maintain the necessary moisture while allowing proper drainage when propagating orchids, creating an environment that emulates the plant’s natural habitat, which is crucial for the development of new growth from back bulbs.
How Do You Create the Perfect Environment for Orchid Propagation?
The perfect environment for orchid propagation involves maintaining high humidity, providing bright but indirect light, and keeping the back bulbs warm—conditions that can often be achieved by using a miniature greenhouse setup.
How Do You Identify Viable Back Bulbs?
Viable back bulbs are typically firm to the touch and have at least one dormant “eye” that has the potential to sprout. Look for back bulbs that are connected to the healthiest part of the orchid.
What’s the Importance of Cleaning and Disinfecting Orchid Back Bulbs?
To ensure the success of the propagation process and to prevent the spread of disease, it is vital to use disinfected tools and work with clean hands when handling and cutting back bulbs.
What Separation Techniques are Recommended for Healthy Orchids?
When separating back bulbs, use sterilized cutting tools and make clean, precise cuts. It is important to handle the bulbs gently to avoid damaging the dormant ‘eyes’ and the remaining plant.
How Do You Maintain Ideal Humidity and Light Conditions?
To maintain the ideal humidity and light conditions for orchids, keep the environment moist but not wet and place the plants in a location with bright, indirect sunlight. You can use humidity trays or enclosures to increase the moisture around the plants.
When and How to Water Your New Orchids?
Water newly propagated orchids when the sphagnum moss begins to dry slightly, ensuring that the water does not stagnate around the roots to prevent rot. It is critical to find a balance where the roots are moist but not soaking.
What is Transitional Care From Propagation to Mature Plant?
As the orchid back bulbs develop and show signs of growth, such as roots and shoots, they should be slowly acclimated to the conditions they will experience as mature plants. This includes gradually introducing them to the growing medium and pot size they’ll inhabit permanently.
What are the Issues in Moisture Regulation and Damping Off?
Over-watering can lead to fungal infections such as damping off, which can be fatal to young orchids. Ensure proper moisture levels by allowing the planting medium to dry slightly between watering and providing adequate ventilation. Regularly check plants for signs of excess moisture, such as mold or root rot.
How Can You Prevent Contamination and Disease Post-Propagation?
To prevent contamination and disease, use sterilized propagation mediums and tools, minimize handling of the orchids, and keep the growing area clean. Also, isolate newly propagated orchids from other plants to prevent the spread of potential pathogens.
Leave a Reply